GAM370- PROFESSIONAL PORTFOLIO
Produce a videogame appropriate environment scene taking influence from Italian/ Mediterranean styled architecture within Unreal Engine:
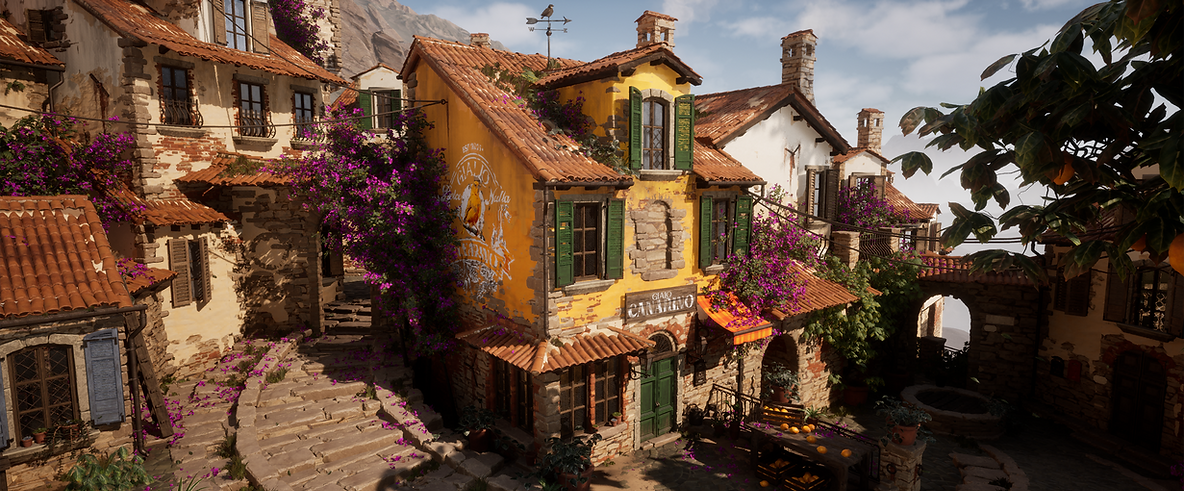
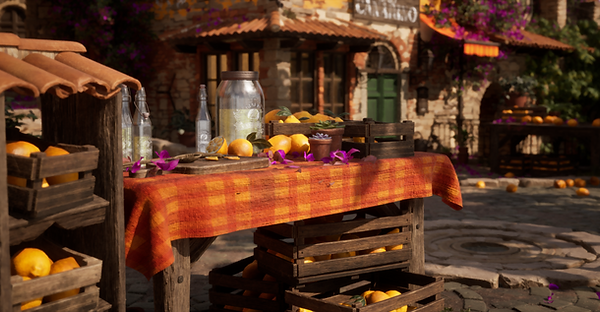
On a hillside sits a traditional Italian style town, red tiled rooves frame layered stone and plaster walls furnished with wooden shutters and balconies, various plants and vines growing wherever possible. Down one of its many cobbled side streets resides the focus of the scene: a small shop; quietly selling its wares. Exuding a sense of peaceful isolation and grounded tangibility.
The scene will be dressed with a variety of location appropriate props and foliage to help promote the idea of a “living” world with rich environmental storytelling, complimented by a heavy focus on lighting/ value structure to push a realistic style.
Taking visual inspiration from games such as:
Witcher 3: Blood and Wine, CDProjektRed, Mafia: The Old Country, Hangar 13 and Indiana Jones: The Great Circle, Bethesda


current- SCENE
This is the current situation of my scene whilst it is at a stage I'm happy to post I have this time around setup my project to allow changes to be made with any feedback I receive. Through actually placing cameras this time and proper file structure for rapid reiterations.
I learnt so much creating all of this and tackled many new skills that were on my list from basically First Year, and think this provides me a great starting point for whatever projects I decide to do next.
BUILDINGS- MODULAR KIT
For this scene I wanted to create a highly efficient modular kit, enabling the creation of various buildings with as few parts as possible. The Pieces I eventually settled on were by nature very basic, almost primitives.
Each building section had 2 UV sets, one for the main tiling textures and a secondary for Material Layer Painting, this allowed for the layering of textures atop of one another within engine.
This was supplemented by sensible set dressing really allowed me to break-up the repetition and whilst it is obvious in some places to an outside viewers first glance hopefully it wont scream as repeating.
If this were a large scale game I could create a variety of building shapes which I will begin exploring further down the line to show-off the diversity possible.


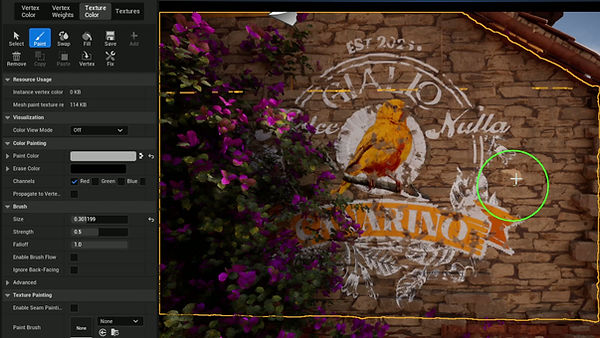
MATERIAL- LAYERS
For materials in my scene I have setup a height blend material. This doesn't use Vertex Painting: instead the new Material Layer/ Texture paint setup within unreal.
Each material is now setup as a "layer" allowing for a highly customisable set of properties, from simplistic albedo to more complex features like level of displacement.
This allows for toggleable Nanite Displacement which is normally disabled when using Vertex Paint. Whilst I know this is still experimental for shipped games, I wanted to use it as an exercise in learning new workflows within Unreal to replicate a likely scenario when working in a studio that will have in-house engines/ systems.
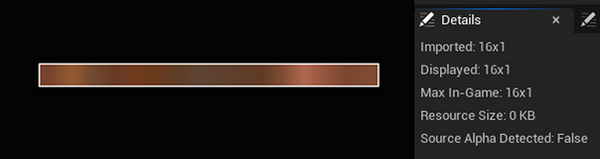
To offset some of this expense I have the option of texturing my assets using custom packed textures. Instead of the default ORM I am using GRAH:
Gradient: This is remapped using in engine gradient curves 16x1 pixels reducing file sizes.
Roughness - Ambient Occlusion - Height


PROPS- Various
For the props within my scene I again used a few approaches: regular individual textured assets, most of these were a selection of assets all textured together sharing UV sheets.
A unique approach that I took with most of my assets was creating a trim sheet equivalent, (instead of a flat textured sheet it was strips which gave a nicer bake result and allowed for more accurate edgewear) using that to make assets such as windows, doors, crates etc
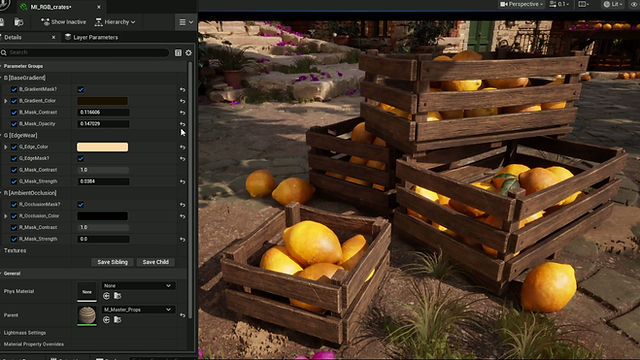
This was then enhanced by again using a second UV sheet (this texture was smaller for optimisation reasons) featuring all the shells laid out (opposed to stacked for Trim texturing) which when taken into Painter I created texture masks based around:
[R - Ambient Occlusion] [G - Edgewear] [B - Base Gradient]
This meant in Engine I could push variation
between assets and have even more creative
control! As seen right!!


ZBRUSH- ASSETS
Using ZBrush for a variety of assets:
Selection of aged wood sculpts baked down onto a lower poly mesh, here used as fascia boards.
Currently within my scene my: Stone Blocks, Tiling Roof Material and Terracotta pots have all involved a High/Low Poly baking process.

PROPS- TOPOLOGY
For all of the props within my scene I really wanted to focus on optimisation and topology. This was based around a recent portfolio review and a personal desire to really hone that side of my skills.
Many assets from ZBrush were manually retopologiesed which again was a process that has started making more sense.
Here you can see only the edge pieces of crates have additional edgeloops, this just breaks up the silhouette without unnecessary loops everywhere. Additionally objects like the spoon have terminating loops maintaining the edge roundness whilst optimising the middle shape.


FOLIAGE- Various
I took several different approaches with Foliage within my scene, for the initial Atlas' my workflows were: Photographed Leaves from a trip to the Mediterranean dome at the Eden Project (Cornish Staple) and ZBrush Sculpts. Whilst the result from the Sculpt was probably my favourite given the level of control; the efficiency of photogrammetry was unrivalled.
For the actual plant creation I used mostly SpeedTree with some Maya for supplementation. What was a program that made no sense whatsoever last year I really found myself understanding the various tools. This was especially evident by the time it came to making my Bougainvillea which I think turned out pretty nicely.


DETAIL LIGHTING- ARCH VIS

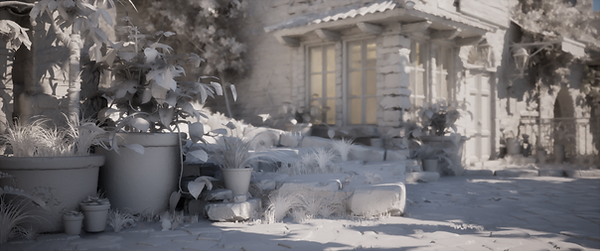
Here is the detailed lighting setup for my scene showcasing what is basically a Whitebox model often used in architectural visualisation. This helps see the details unobstructed by colour and highlights my lighting work. Whilst my scene in some places I still feel is fairly noisy, the final result is a far cry from some of the previous iterations striking a healthier balance.


VALUE- POST PROCESS
Using a nifty Post Processing Volume with 0 saturation I can easily see the current value structure of my scene.
I will be frequently using this throughout to ensure all elements have a cohesive read. Additionally this makes certainly elements such as the current level of noise stand out. For example the bricks, stone and placeholder floor are all VERY noisy