
GAM208- PORTFOLIO DEVELOPMENT
“Imagine a place forgotten to time. Consider the original purpose of the space, what happened to result in its abandonment, and how time and weather has eroded it. This place could be anything; an old stone ruin of an ancient civilization, a space station destroyed by a catastrophic event, or simply an abandoned home left to be reclaimed by nature. When coming up with the history and setting I encourage you to think creatively.
You should consider, how to tell the narrative of the space through environmental storytelling. How will the player interact and move through the space. What is the focal point/composition of the scene?
In this assignment you are creating your own game ready scene and a hero asset based on the brief provided by our industry expert, Louis Sullivan. Your hero asset will serve as a focal point, your hero asset can also be a piece of tech art if you wish.

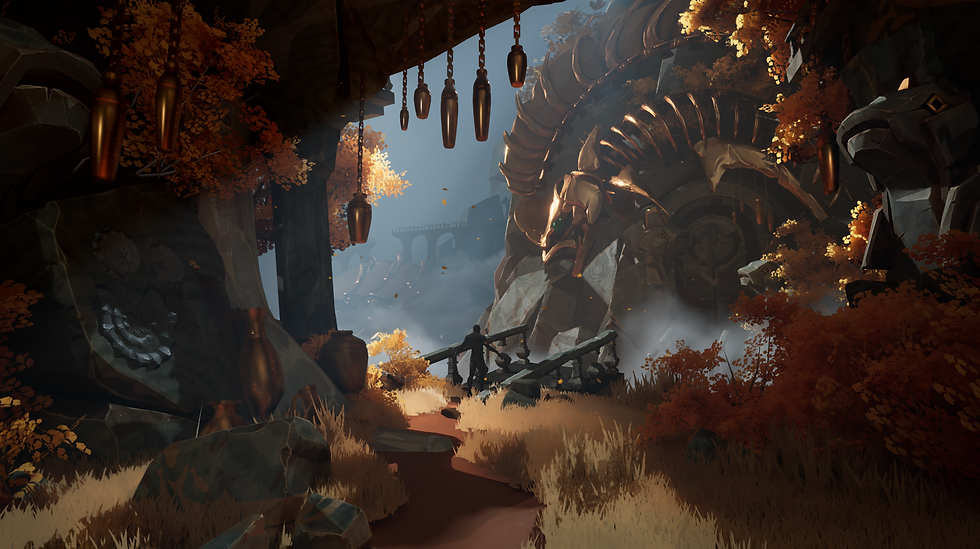
THE FINAL CONCEPT
A lone traveller ventures through a long-forgotten canyon. Within it’s high walls sits a great fossil, a glimpse into ages gone by. This gargantuan marine creature’s tale captured in the rock like a lost mural to an ancient deity’s reign. Once a vast ocean now reduced by the sands of time, where currents once shifted now only the wind howls. All is not lost however, merely changed, with new life finding it’s foothold within this sheltered refuge. Yet time marches on and maybe one day this land shall once again return to a watery depth with the travellers who now wander adorning the walls instead.
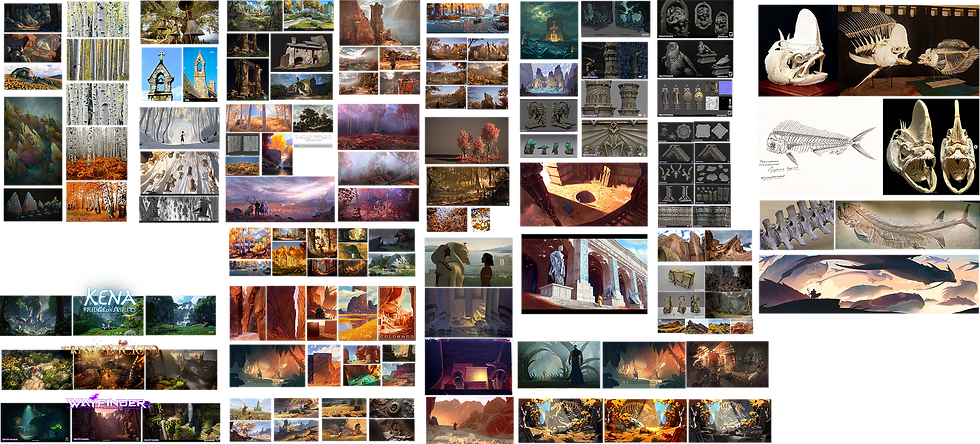
I will be seeking inspirations from several real world mythologies most notably the legendary city of El Dorado. Influenced by my research into marine skeletons and discovery of the unusual Mahi Mahi fish (on the PureRef above) also known as the Dorado fish due to it's resplendent coloration. Expanding further afield with the recurring iconography of golden fish throughout many cultures: from the Ashtamangala in Buddhism to Matsya a gilded fish deity incarnation of Vishnu in Hinduism who's story is tied to saving humanity after one of many cataclysmic floods prominent in various religious texts.
PROGRAMS TO BE USED:


‘Over the Mountains Of the Moon, Down the Valley of the Shadow, Ride, boldly ride,’ The shade replied,— ‘If you seek for Eldorado!” - El Dorado
- Edgar Allen Poe


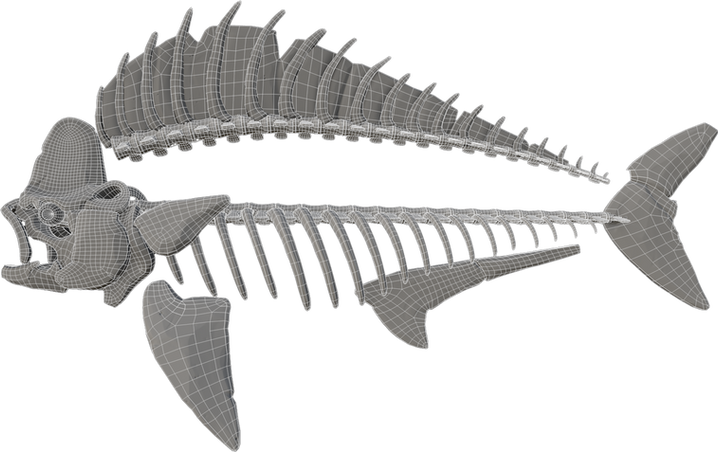
HERO ASSET- FISH SKELETON
For the scenes Hero Asset I've made a large skeleton. The original plan was to create a marine lizard fossil, like that of a Tylosaurus or Mosasaurus, pyritized to give a golden metallic sheen. But this shifted to a more unique fish, the Mahi Mahi, also known as the "Dorado" fish.
This process began in ZBrush, one new tool that I explored with this asset was the MorphTarget workflow. This involves storing a version of the mesh then using the MorphBrush to revert any changes back to the stored version. This allowed me to achieve some nice cracks and surface details that would've otherwise be troublesome and will certainly be added to my frequently used collection alongside HPolish, TrimSmoothBorder and DamStandard. Overall Bolstered with my improved understanding of the Dynamesh function, discovering the ability to remesh and polish producing even cleaner edges.
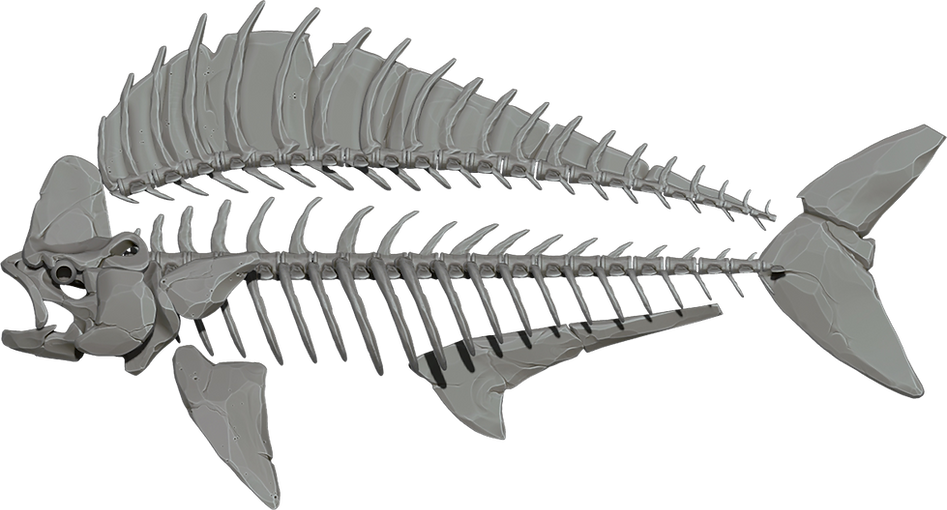


Through the process of retopologising and rigging (originally for the purpose of getting a nice curve with minimal deformation) I decided to push the asset even further and create a fully animated version that could have multiple uses within my scene. The fish is skinned (explains why there is only the skeleton!) and rigged with connected bones (of the technical variety!) in MAYA. Master controls are exposed/ setup to allow alterations to the base curve which moves the main body, for the swimming animation the curve is deformed along a sine wave = fish like movements. Informed by Reins Academy video: https://youtu.be/D0m158KjsZo?si=KmBOmR5wDjsxW1cJ This deformation is also what enables the creation of the main stationary, curved fish.
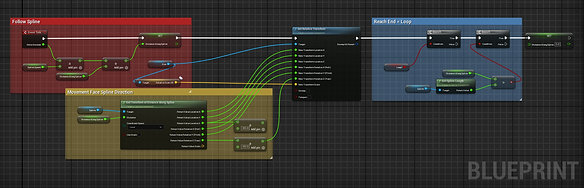

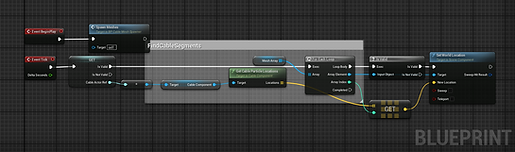
I made the Unreal Blueprint above following the premise setout by Gorka Games: https://www.youtube.com/watch?v=jjvPoTSTjsw This enables the fish to travel along a customizable spline, with parameter options such as speed, looping and distance along the spline in which you want the entity to start. The scale of the fish does mean the spline is not perfectly followed but with this setup I can achieve a large amount of fine tuning to get a desired result.
The Fish is textured using 3 2K UDIMs as to explore a new workflow. This however could've been a simple 4K texture instead for a more simplistic implementation down the asset pipeline as makes certain steps more troublesome through being a UDIM.


Manual Retopology had varying degrees of success, some areas are still overly dense, however the actual asset is large within the scene, requires deformation and eventually included the ability to vertex paint alternative materials so felt this higher density on the face was somewhat warranted but could still be reduced a LOT further. Generally however I found my understanding of retopology improve and would tackle certain bits differently now.


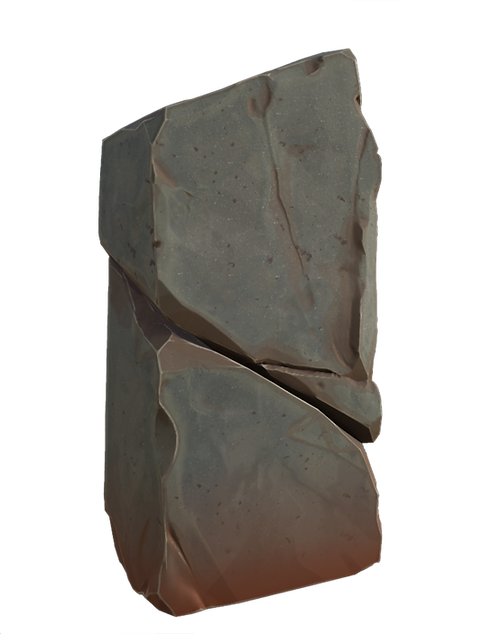
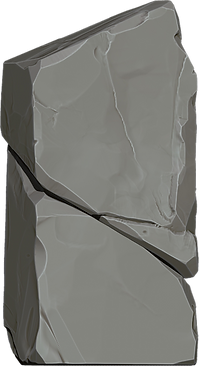
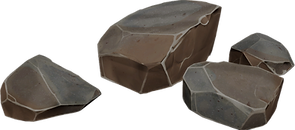
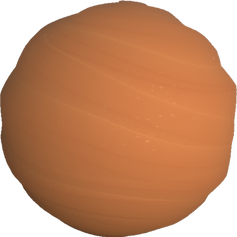
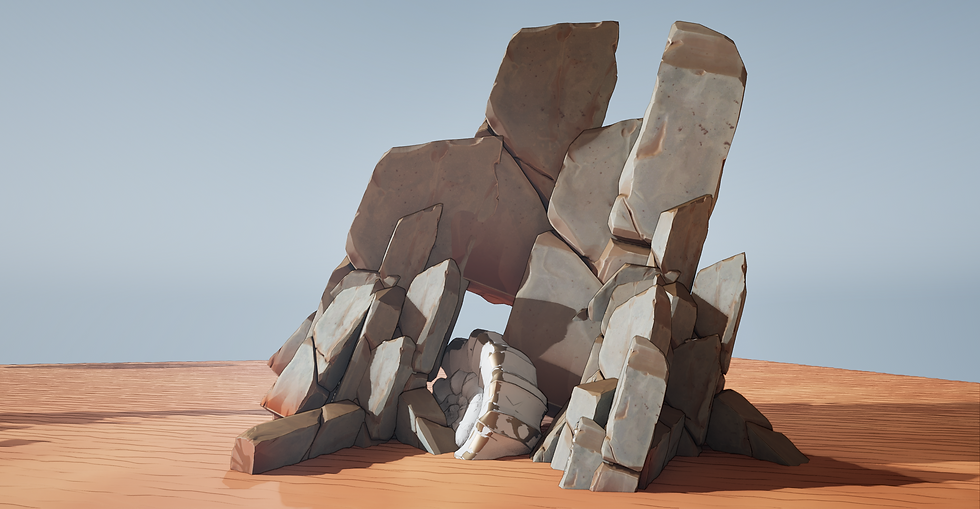
ROCK- ENVIRONMENT
Rock sculpted in ZBrush, retopologised in Maya and textured using Substance Painter. Within Unreal I used a couple RuntimeVirtualTextures (RVTs) to produce a build-up of sand atop the rocks in addition to a transition blend into the landscape, grounding them to the wider scene/ breaking up repetition. In addition to a WorldSpaceTexture for not only a base tiling rock texture but also a swirl pattern adding another level of interest whilst ensuring some texel consistency when scaled up/down.


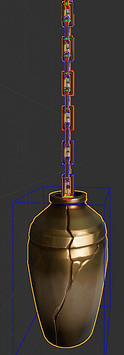
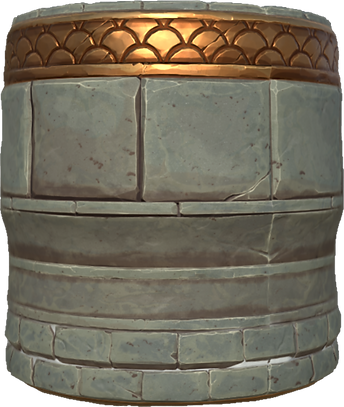
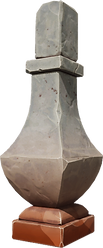
VASES- PROPS
Base mesh is modelled in MAYA, high poly sculpted in ZBrush, details are baked using Substance Painter.
Pots and vessels being a main stay within videogames if this were a playable level they would of course be breakable. But on a worldbuilding level they also take inspiration from 2000's Road To Eldorado, in which many golden artifacts are sacrificed to Xibalba (the underworld in Mayan mythology).
These are all textured on the same Atlas for maximum efficiency.
I also used the fish found on my logo for a small amount of cohesive ornamentation, furthering the the fish imagery and overall "lore" of my scene. Which are then later used as scene decals too.
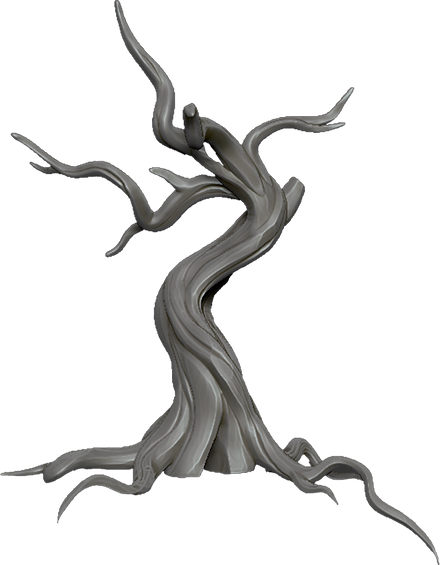
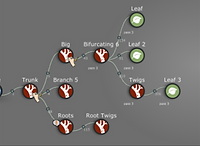
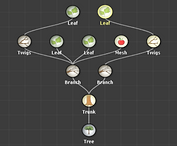
TREE- TREEIT
A brief test tree created in SpeedTree. This was my first experience using the program and whilst the asset was okay it wasn't quite the look I was seeking! I feel where speedtree excels is with realistic assets and the creation of highly detailed branch atlas' which isn't the style I wish to achieve with this piece.
For my follow up tree I explored TreeIt a program that achieves similar results to but is free. Through this I managed to create more stylistically appropriate trees with denser leaves. The trunk later being sculpted in ZBrush.


For the Leaves I chose the Ginkgo Tree given it’s resemblance to fish scale patterning, plus relations to: strength, resilience and longevity, being one of the oldest living tree species in existence. Ancient specimens being found alongside Dinosaurs fossils.
The material within Unreal follows Viktoriia Zavhorodnia (akbutea) https://youtu.be/yvKWDkKSWnQ?si=8rJyv8NwBWkEKXBi
Tutorial with some personal alterations mostly around a custom wind master setting.
This overall adds a normal based gradient to the leaves, allows for rescaling of the cards to appear more full/ "fluffy" in addition to Quick leaf shape and colour changes.


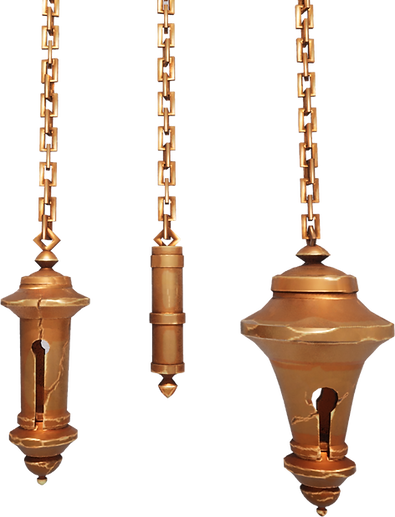

CHIMES- ALEMBIC
Standard asset creation workflow, however where interest starts is with the animation and desire to have the chimes sway with the wind. Up till now never noticed glaring absence of moving chains within games. Cable actors in Unreal provided a pleasant customizable swaying but at the cost of Harsh vertical lines aggressively breaking up my general composition.
Attempted a physics constraint approach using an induvial link section, this was highly customisable and interactable but ultimately was causing more visual issues that ruined immersion, through comically bouncing chains that moved with mouse.
I also tried spawning links along the cable actor (cable actors spawn particles between given points to produce the effect of a continuous rope) Which also failed to produce the results I wanted.

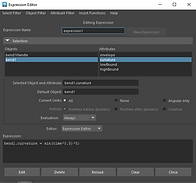
The result that worked was again using the fish inspired bend deformer, with a custom expression (had no idea this would be so handy):
"bend1.curvature = sin(time*0.5) *5;
This with the bounds set correctly made the chains sway, whilst not as customisable in engine as my previous approaches does add the required movement.
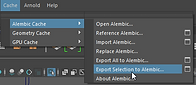
To export this animation I used an Alembic Cache efficiently storing the computed results of the procedural animation.
One important factor when importing to Unreal is to ensure the scale is set higher than the default 1 since this makes the mesh look lower resolution.
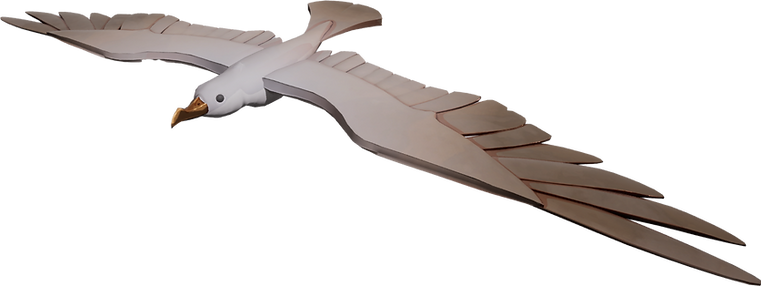
BIRD- ANIMATED
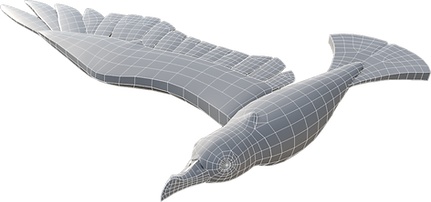
Bird was sculpted in ZBrush, retopologised in MAYA. The Texture for this bird is also 1024x1024 given the fact it wont be close to the camera and will hopefully have lots of the birds on screen at any one time.
Overall the polycount could be lower but had issues with deformation looking strange and should it be correctly rigged and animated having a higher fidelity model increases the usage outside of ambient flying. Animated using deformers and another alembic cache.


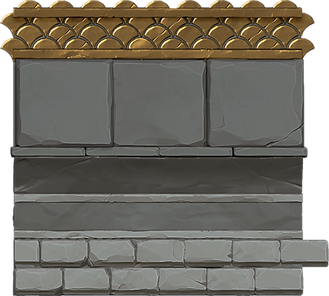
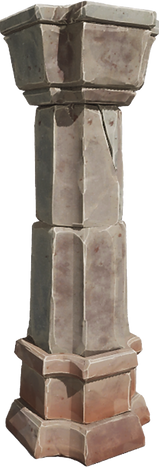
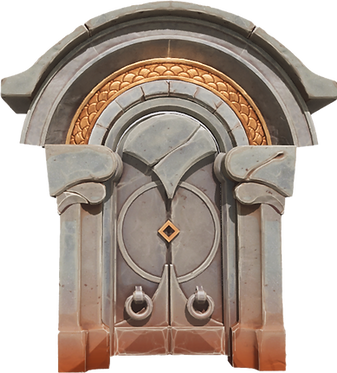
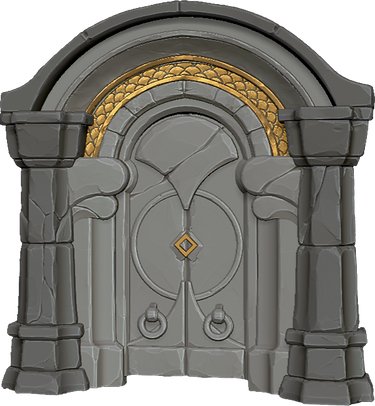
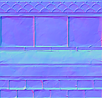
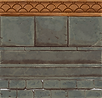
RUINS- MODULAR TRIM
For the more architectural ruin elements of my scene I produced a mix of trim sheets and individually textured assets.
For the main trim sheet I again sculpted in ZBrush a series of varying sized stone blocks. The gold trim pattern being inspired by the aforementioned crossover of fish scales/ gingko leaves.
Whilst scale was less important on this piece texel density was: so each 2K texture was set to be 4m. To ensure it matches the other assets within the scene.
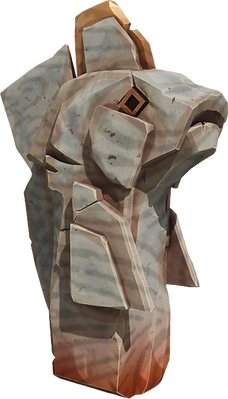
The fish statue was inspired by the Shark Totem from Sea of Thieves concepted by the excellent Thomas Mahon: https://thomasmahon.artstation.com/projects/lVmlOY
Instead taking the form of my main Mahi Mahi Fish.


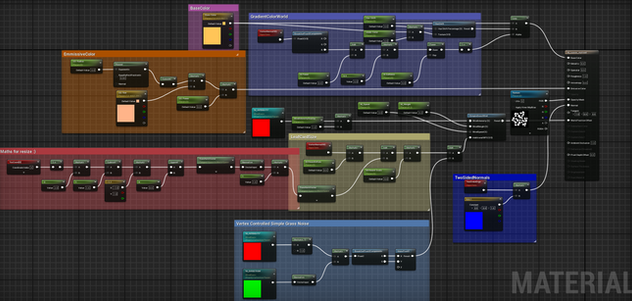
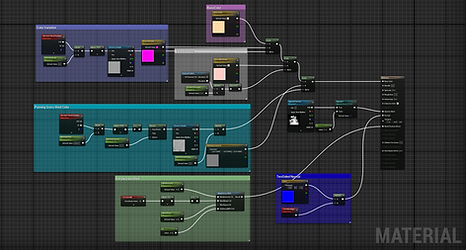
SHADERS/
MATERIALS- UNREAL ENGINE
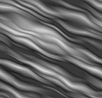
Something I wanted to setup early on were my main landscape materials/ filler content. This involves a tiling sand material created in Substance Designer. Within Unreal the heightmap is used on the terrain for nanite displacement creating an extra level of depth.
Over the top of this is a panner texture, (a texture map scrolling above a material, often used
for various VFX) producing the effect of a lose layer of sand blowing across the dunes in the wind.
Mostly inspired by UnrealityBites https://youtu.be/iyS9hU1XWP4?si=jTgoFzvcjFt629kv
This same effect is applied to my grass material (exaggerated for visibility) reusing the black
and white height map for the sand, thus creating a secondary level of detail making it seem
more painterly and dynamic.
For the grass in my scene I created a basic clump style atlas, made in Photoshop, applied with
opacity to a plane the negative space was cut out, becoming the basic mesh. This mesh is then
moved/ warped slightly adding depth and breaking up the silhouette, duplicated around to collate
a single grass patch asset.
The main foliage material has: local mesh Gradient, further mass colour variation. Exposed parameters for
all colours aswell as the main opacity mask/ shape for increased utility opportunities with other foliage actors.


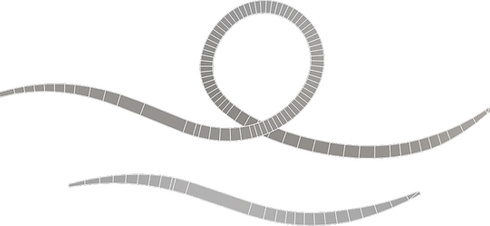
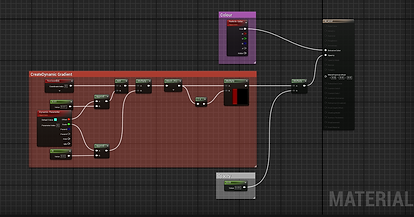
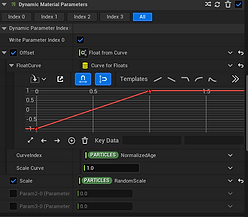
niagara- wind & leaves
My 2 Niagara systems are relatively simplistic using a modified blowing particles for the falling leaves, I did produce a version where the particles were replaced with meshes however the results didn't warrant the more expensive processing demand.
For the spiralling wind trails I found a really interesting tutorial by
Rimaye: https://youtu.be/5s22gzA5yV0?si=qerdpKw6whJg1yCl
This involved creating a curve/ sweep mesh that would have
a scrolling gradient through the
straight UV's producing the
effective illusion of a spiralling wind formation.
This gradient is created in the Unreal Material
editor and scrolls as time passes within the
Niagara system. These then spawn with customisable
frequency within a designated box ensuring they only exist
where wanted and not across the entirety of the Unreal level. (Something I
only found through error and wondering why my performance was tanked)

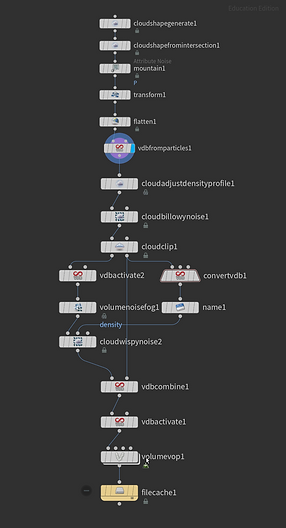
CLOUDS- Houdini
I created a single volumetric cloud for my scene, this was created in Houdini using the newly available 2024 cloud tools. The main workflow around these involves generating a standard cluster of geometry and converting that into a volume.
Each of these nodes work similarly to designer given both programs procedural nature meaning there is a high level of customizability and ability to create the shape wanted. Once the main shape is created using various noises (wispy noise being a personal favorite) an additional noise is scrolled through producing the illusion of movement.


The material in Unreal is relatively simple version of the StaticSparseVolume. The main aspects being:
Position: Ensures the cloud is correctly located
BlackBody & Temperature: Used to compute smoke/ explosions and control any emissiveness (used slightly to make the clouds looks more stylized)
Density: Definition of individual voxels
OUTLINEs- UNREAL ENGINE
Whilst this was ultimately a scrapped failure due to incompatibility with my eventual environments direction the experience of creating a shader was still valuable. And I will be revisiting using these outlines in future as do love the clarity and confidence it demands of every edge and asset.
For this project I wanted to attempt a couple stylisation workflows and create my own shader. Taking inspiration from one of my most beloved artists Matt Rhodes who uses outlines to great effect within his work.
Following a combination of a few tutorials out there mostly: Visual Tech Arts: Outline Shader Series: https://www.youtube.com/watch?v=Ptuw9mxekh0
The final result utilsing a Laplacian curve that produces an outline wherever an edge is detected.
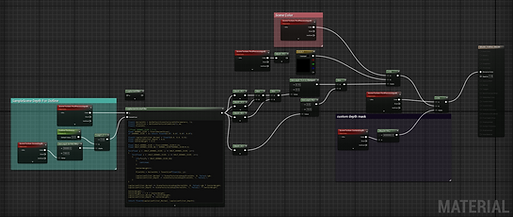
I created an outline shader following several online sources. This adds a more subtle, stylised appearance and I personally feel pushes my desired art direction towards more of a unique feel. However there is an unfortunate interaction when it comes to fog or any volumetrics:
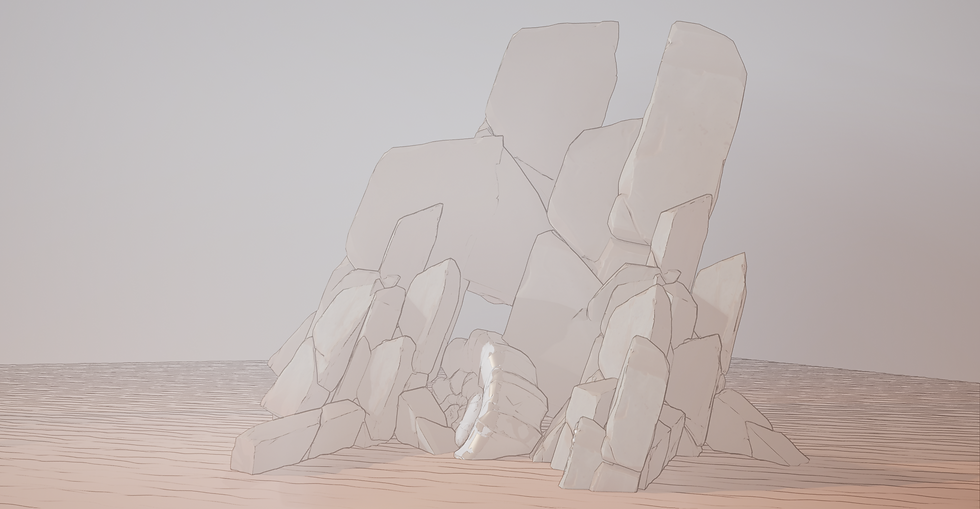
The outline will always be visible through the fog or Houdini clouds. This is due to the render order in unreal and Post Processing obviously coming last. This creates a massive issues when it comes to creating a pleasing value and depth structure.
I created an outline shader following several online sources. This adds a more subtle, stylised appearance and I personally feel pushes my desired art direction towards more of a unique feel. However there is an unfortunate interaction when it comes to fog or any volumetrics:
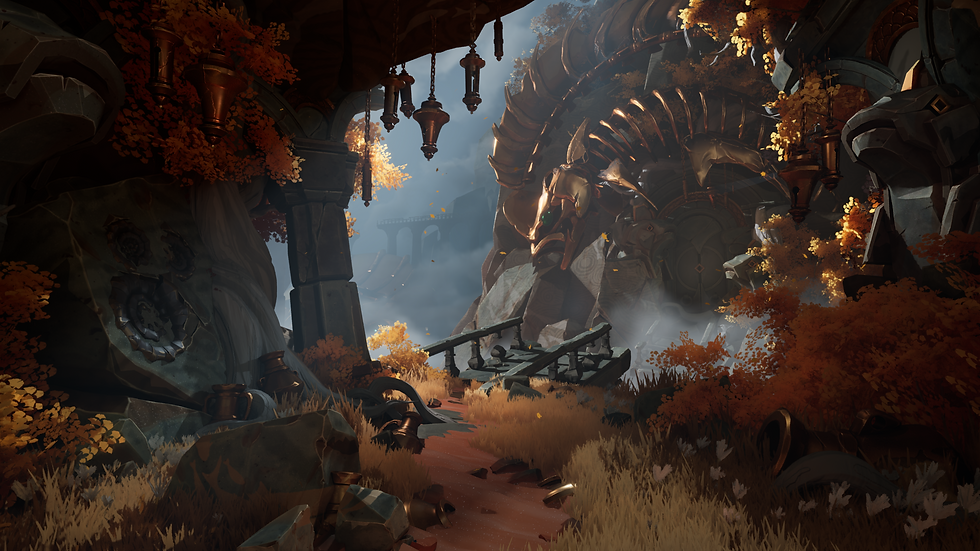
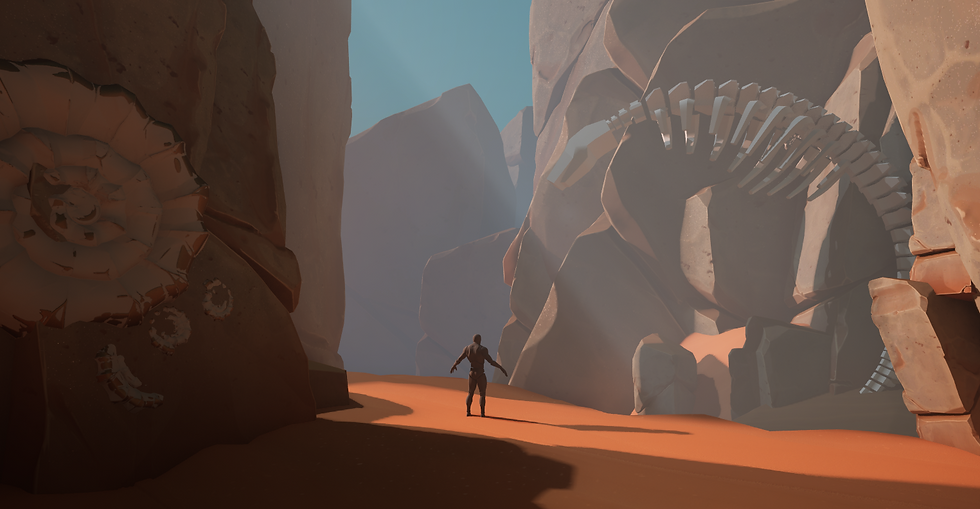
PROGRESSION SHOTS
This project has gone through 2 main large scale iterations. Both of which I feel have merit and deciding between them is never a task I enjoy. However being able to achieve a variety of different scenes/ compositions with the same relatively small collection of assets is precisely why I enjoy creating videogame environments... Possibilities are truly endless and constantly changeable.


FINALE- CONCLUSIVE THOUGHTS
This project has certainly been a huge learning curve, presenting it's fair share of challenges, whilst enabling many first time opportunities with a variety of workflows/ systems. I tackled animation/ dynamic elements in addition to far more Unreal based systems this time around which I am proud of confronting head on and cannot wait to continue exploring in the future.
Stylisation was a greater challenge than I anticipated like many others believing the often perceived as more "simplistic" shapes would be more natural to produce. Which as this project progressed I did find myself become more confident with how to achieve various results most notably within ZBrush. Overall looking at the scene as a whole I do feel the visuals are mostly successful and have some evident influence from what I set out to study. (Kena Bridge of Spirits, Wayfinder, Sea of Thieves and No Rest For the Wicked) even if I am still not entirely content with the results.
Translating an entirely original concept was also an enormous task, filled with a lot of turmoil and discontent. But seeing where I eventually ended up compared to my initial thoughts has reinforced the importance of sometimes letting ideas run a bit more wild and how holding on too tightly to a given concept is often harmful. My final piece being a far cry from an outline shaded desolate valley with little interest which was a direct result of having a large scale reflection and looking for fresh inspiration in new directions.
Many thanks to everyone who has helped me along the way but most notably I would like to thank Louis Sullivan for providing the industry brief. This was a fantastic experience and to have the chance to gain your feedback during this project was a truly invaluable opportunity.

THE END!
Thank you for looking at my page.
I truly appreciate you taking the time to look at my work, any and all feedback is greatly welcomed....
